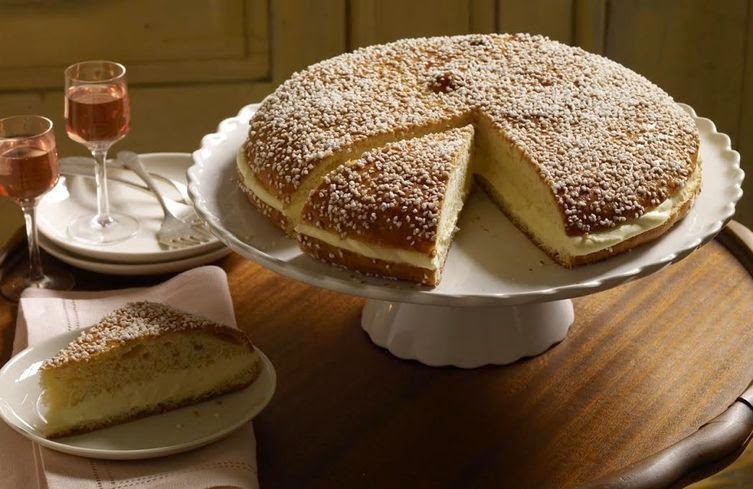
French Food Friday...Tarte Tropézienne
recipe and photo from here
Bonjour mes belles,
I cannot think of anything nicer than a lovely cake perched on a lovely cake stand and this one tastes as good as it looks...
Tarte Tropézienne
Makes 12 servings
- 2 1/2teaspoons active dry yeast
- 1/3cup (80 mls) warm whole milk (see yeast package for exact temperature)
- 2cups (272 grams) all-purpose flour
- 3 tablespoons sugar
- 2 large eggs, at room temperature, lightly beaten
- 1/2teaspoon fine sea salt
- 2teaspoons dark rum or kirsch (optional)
- 1teaspoon pure vanilla extract
- 7tablespoons (3 1/2 ounces; 99 grams) unsalted butter, at room temperature
For the filling:
- 1 1/2cups (360 mls) whole milk
- 4 large egg yolks
- 1/3cup (67 grams) sugar
- 1/4cup (32 grams) cornstarch
- Pinch of fine sea salt
- 1tablespoon pure vanilla extract or 1 tablespoon orange-flower water, plus 1 teaspoon pure vanilla extract
- 3/4 stick (6 tablespoons; 3 ounces; 85 grams) unsalted butter, cut into bits, at room temperature
- 1/4cup (60 mls) very cold heavy cream
- 1 large egg, for glazing
- Pearl sugar or crushed sugar cubes, for finishing
- To make the cake: Put the yeast in a small bowl and pour over the warm milk. Allow the yeast to stand for a couple of minutes, until it’s fully dissolved; it might or might not bubble.
- Put the flour and sugar in the bowl of a stand mixer fitted with the paddle attachment. Mix at low speed to blend the dry ingredients, then scrape in the yeast mixture and beat just to distribute it; you’ll have a shaggy mix. Keep the mixer spinning on low and add the eggs in a slow stream, then beat in the salt, rum or kirsch, if you’re using it, and vanilla. Increase the mixer speed to medium and beat, scraping down the bowl occasionally, for 5 to 8 minutes. The dough will start off rough and pockmarked, then it will pull into strands as the mixer spins and, finally, it will be smooth and form a ball.
- Check the butter -- you want it to be soft but not oily. If it’s not soft, smear it across a work surface with the heel of your hand. Up the mixer speed to medium-high and toss in the pieces of butter a couple at a time. Keep mixing after the last bit of butter goes in until you’ve got a dough that forms a ball around the paddle, another 8 to 10 minutes.
- Turn the dough out into a large bowl, then cup your fingers under the dough, lifting it and letting it slap down into the bowl again as you work your way around the bowl; when you’ve come full circle, you should have a nice, smooth, somewhat flattened ball of dough. Cover the bowl tightly with plastic film and put it in a warm place (70° to 75° F) until it rises to approximately double its original volume, 2 to 3 hours.
- When the dough has risen, deflate it, using that same lift-and-drop method, cover the bowl tightly again and put it in the freezer for 30 minutes to arrest the dough’s development. Then transfer it to the refrigerator and chill for another 2 hours. (The dough can be refrigerated for up to 2 days.)
- About an hour before you’re ready to bake, line a baking sheet with parchment paper or a silicone baking mat. Remove the bowl from the refrigerator and turn the dough out onto a lightly floured work surface. Gently pat the dough down, lightly flour the top and roll it into a 10-inch circle. Don’t worry about it being exactly 10 inches; concentrate on getting it round and almost that diameter, or smaller. Slide the dough onto the baking sheet, cover with a piece of plastic film -- don’t press down on it -- and let the dough rest in a warm place for 1 hour.
- Meanwhile, make the filling: Bring the milk to a boil in a medium saucepan.
- Whisk the yolks, sugar, cornstarch and salt together in a medium bowl. Whisking constantly, drizzle in one quarter of the hot milk. When the yolks are warm, add the rest of the milk in a steadier stream. Pour the mixture into the pan, return the pan to medium heat and, whisking vigorously, bring back to a boil. Keep at a boil, still whisking, for 1 to 2 minutes, making sure to get your whisk into the corners of the pan. Scrape the pastry cream into a bowl, add the vanilla and allow it to sit for 10 minutes at room temperature.
- Add the bits of butter to the pastry cream a couple pieces at a time, whisking to incorporate. Press a piece of plastic film against the surface of the cream and chill for at least 2 hours, or, to speed up the chilling, put the bowl in a larger bowl filled with ice cubes and cold water and whisk until cold, then refrigerate until ready to fill the cake. (You can make the pastry cream up to 3 days ahead and keep it well covered in the refrigerator.)
- To bake the cake: About 20 minutes before you’re ready to bake, center a rack in the oven and preheat the oven to 400 degrees F. Lightly beat the egg and add a splash of cold water to it. Brush the top of the dough with the egg wash and sprinkle over the pearl or crushed sugar, patting it down lightly so that it sticks. Be generous with the sugar -- you want to pretty much cover the top.
- Slide the baking sheet into the oven and immediately turn the oven temperature down to 350° F. Bake the cake for 20 to 25 minutes, rotating the sheet after 10 minutes, or until it is golden brown on both the top and bottom. Transfer the cake to a cooling rack and let it come to room temperature.
- When you’re ready to fill the cake, whip the heavy cream until it holds firm peaks.
- Remove the pastry cream from the refrigerator and whisk to loosen it. Stir a little of the whipped cream into the pastry cream, then fold in the rest of the whipped cream with a flexible spatula.
- To finish the cake: Using a long serrated knife and a very gentle sawing motion, cut the cake horizontally in half(ish) -- it’s good to have the bottom layer a little thicker than the top. Put the bottom layer on a cake plate. Spread the filling over it, leaving a slim border bare, and replace the top of the cake, jiggling it slightly to settle it into the cream. Chill the cake for at least 1 hour, or for up to 8 hours. The filling needs to set in the refrigerator and the cake should be served cold.
- Serving: In Saint-Tropez, the cake is sometimes a dessert, sometimes a pick-me-up and, if it’s bought as a miniature from a pâtisserie in town, sometimes a snack. Since it comes from a town once known for its wild and crazy ways, it’s not surprising that there are no real rules.
- Storing: You can make the pastry cream up to 3 days ahead and refrigerate it, and you can keep the brioche dough in the refrigerator for 1 day before you bake it. Once cut and filled, the cake can be kept in the refrigerator, away from foods with strong odours, for about 8 hours, or you can wrap it airtight and freeze it for up to 2 months. Defrost, still wrapped, in the refrigerator overnight.
très bon vendredi à tous, Leeann x
I *LOVE* Tarte Tropezienne! We do have e very good "patisserie" in our little village in Provence, and their "tropezienne" is so yummy. But Provence is so far away from here.... :(
ReplyDeleteThank you so much for sharing this recipe - I will try this soon and then I can enjoy my own Tarte Tropezienne here in Germany! ;)
Bon weekend, bises, Monika
Oh my Leeann, you tempt me every single week and this delightful Tarte is no exception!!
ReplyDeletexoxo
Karena
The Arts by Karena